Windows Installation
Step 1: Prerequisites
Please do not skip any of the steps!
Getting BolehVPN up and running consists of 2 easy steps:
- Installing BolehVPN-GUI: This is the program that establishes the VPN connection Choosing the Configuration you wish to use: Each configuration works differently and is specially optimized for different purposes be it for speed, security or convenience.
- Configuring your programs to use BolehVPN (only applicable for some configurations): Some of our configurations require additional configuration on the programs you wish to pass through the VPN.
Step 2: Installation of BolehVPN-GUI
These instructions are for Windows 7, 8 and 10 users
- First of all, download the installer from the link below.
BolehVPN GUI 3.0.7
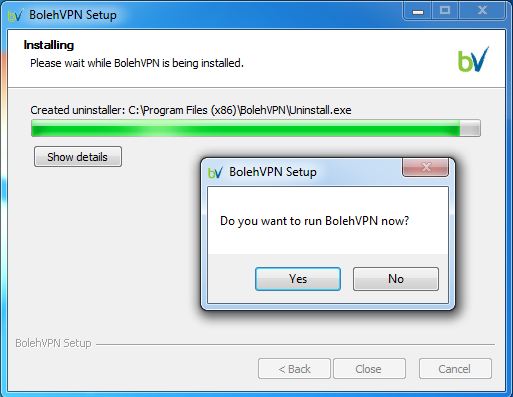
Some antiviruses may detect this as a virus after you install but it is a false positive. - Run the executable file that you have just downloaded. If you have User Account Control (UAC) on, click Yes. An installation window for the TAP adapter will also pop up. Please proceed with the installation. (We recommend you remove any previous installation of any TAP adaptors and/or BolehVPN clients if you haven’t done so)
- Once this is done, please run the GUI by selecting yes. Otherwise, double click on the BolehVPN desktop shortcut or launch it via Start > All Programs > BolehVPN > BolehVPN
- At this point, another UAC dialogue will open, asking for permission to make modifications. Click Yes. This will enable Windows to create a VPN route which requires elevated Windows administrator privileges.
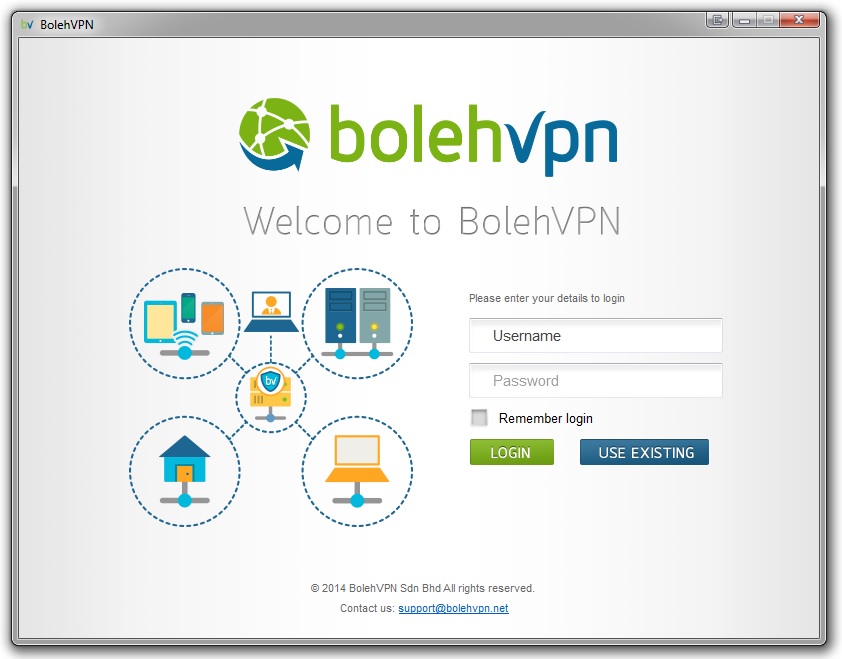
- You will now be prompted to enter in your username and password. This is the same username and password that you use to login into our user portal.
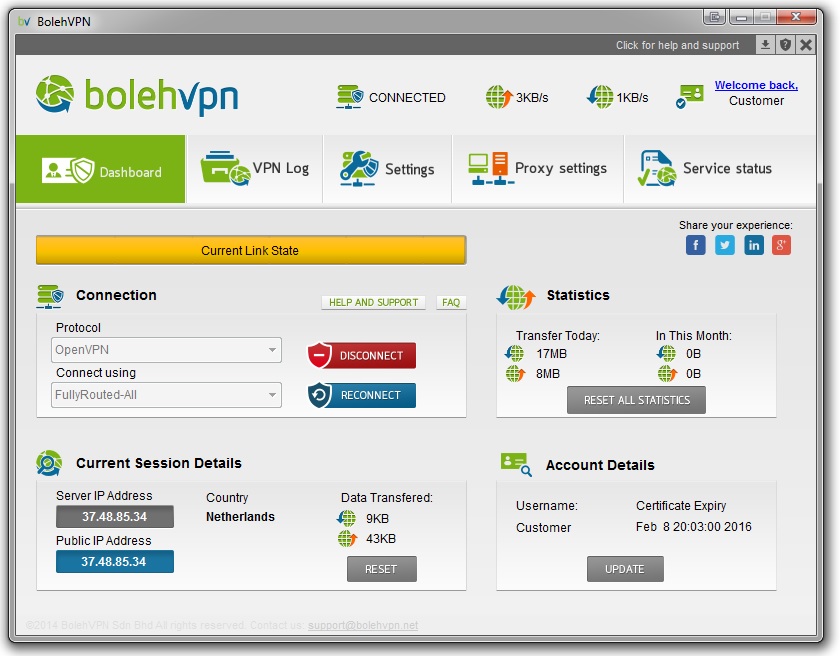
- By default, the configuration files and certificates will be updated on every startup. This can be changed easily by going to the Settings tab. Here you can configure the GUI to your liking.

- Once it has successfully updated you will see a drop-down list with multiple server options. If some reason, the “Connect using” box remains greyed out and stuck at “Login …”, please contact us at support[a]bolehvpn[dot]net and we will get you sorted out.
- For starters, you can try connect via one of the FullyRouted servers to see if there are any glitches. Make sure you select OpenVPN under Protocol and select a FullyRouted server from the list and then click Connect.

- Give it a few moments and congratulations, you should now be connected!
A log of a successful connection:

- Also, you can also access the client via the bottom right-hand status bar/system tray for your ease of use.

- Now before you go on, please click Disconnect and proceed to the next page to learn what each different configurations do as they work pretty differently!!
Credits & Open Source Software
BolehVPN-GUI is our proprietary program that merely acts as graphical user interface to simplify the VPN setup process.
Its backbone however is based off the following open source technologies and code which are freely available and open to inspection:
![]() XOR Patch for xCloak by haggismn
XOR Patch for xCloak by haggismn