BolehFlix – Windows
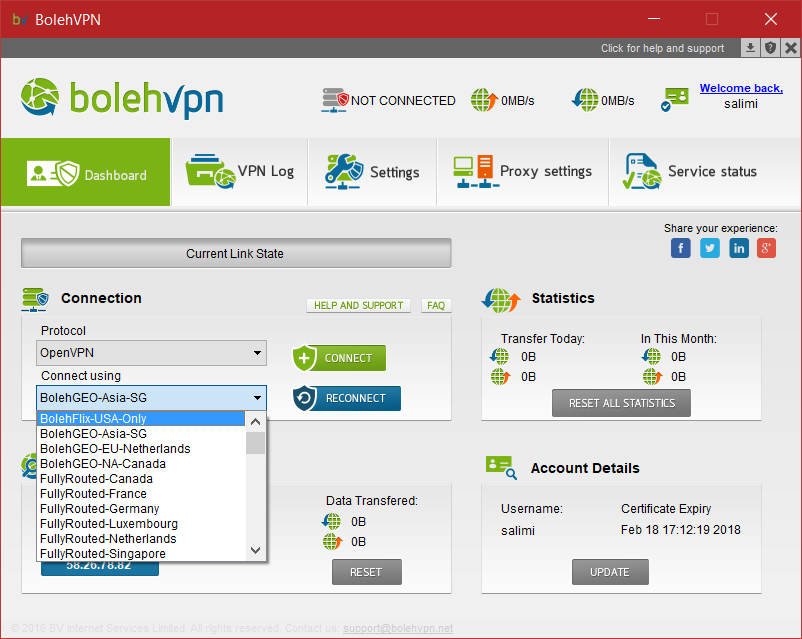
Step 1: Connect to any of the BolehFlix-prefix servers. Any will do.
Start up the BolehVPN Client Application and connect to any of the BolehFlix-prefix servers:
Step 2: Changing your DNS on your PC
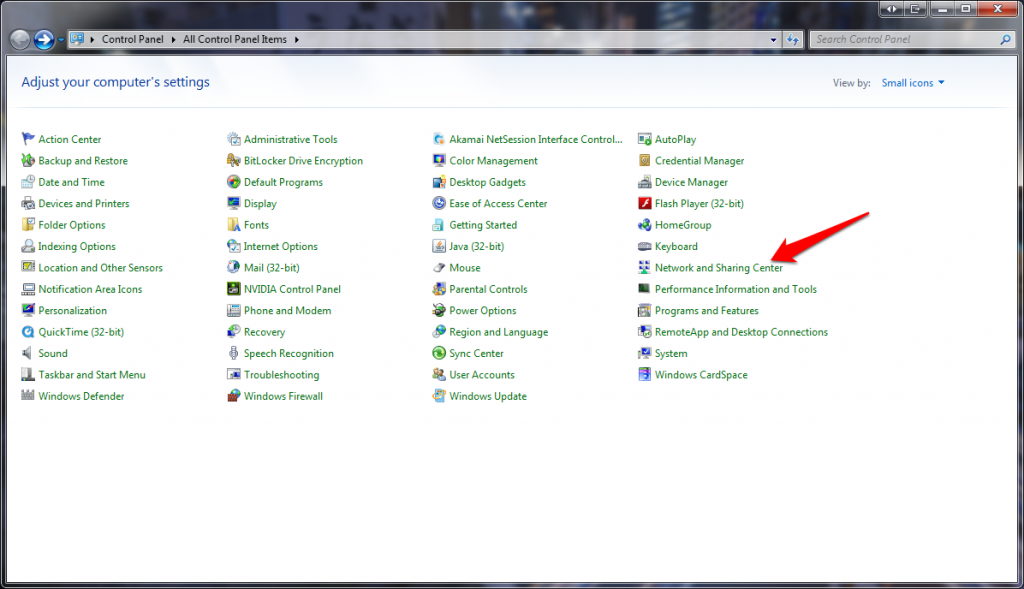
To do this, We need you to go to your network settings on your PC.
- For Windows 7, Head to Start > Control panel > Network and sharing center > on the left pane, Change adapter settings. For Windows 10, Head to Start > Control Panel > Network and Internet > Network and Sharing Center > On the left pane, Change adapter settings.
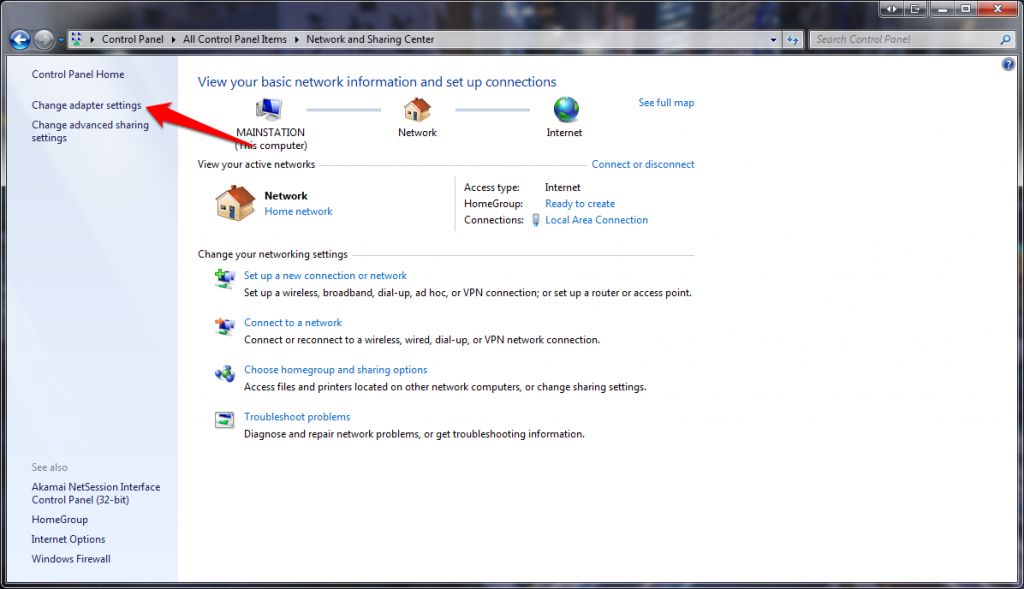
- After clicking the Change adapter settings, Select your Primary LAN interface. It should be “Local Area Network” (without any numbering at the end). If you are using wifi as your means of connecting to the internet, select the Wifi LAN interface.

- Right Click the Icon and select Properties. Then select Internet Protocol Version 4 (TCP/IPv4) from the list.
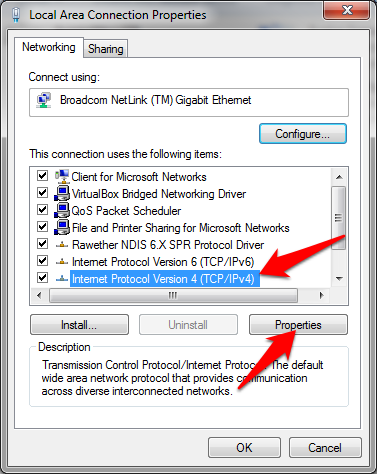
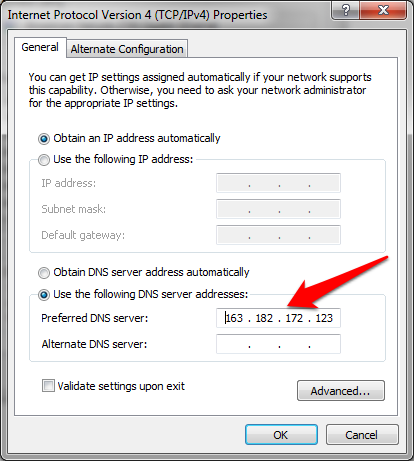
- Tick the Use the following DNS server address. Enter this IP 163.182.172.123 and click OK.
- You’re done. Surf the NetFlix with ease now.
Optional: To revert settings after disconnecting BolehFlix
To do this, We need you to go to your network settings on your PC.
- For Windows 7, Head to Start > Control panel > Network and sharing center > on the left pane, Change adapter settings. For Windows 10, Head to Start > Control Panel > Network and Internet > Network and Sharing Center > On the left pane, Change adapter settings.
- After clicking the Change adapter settings, Select your Primary LAN interface. It should be “Local Area Network” (without any numbering at the end). If you are using wifi as your means of connecting to the internet, select the Wifi LAN interface.
- Right Click the Icon and select Properties. Then select Internet Protocol Version 4 (TCP/IPv4) from the list.
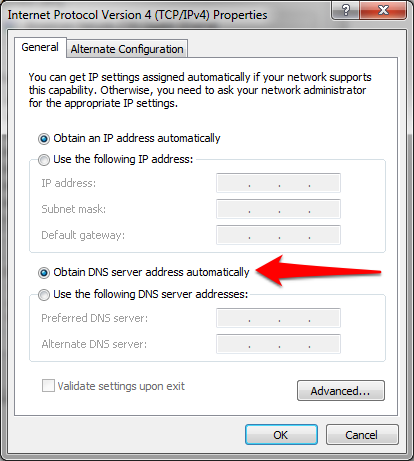
- Click the Obtain DNS server address automatically.
- Click OK and close all tabs.